Publishing Your RootsWeb Site with Core FTP LE
Step One: Download and install Core FTP to your computer. NOTE: Core FTP LE is the FREE version. Core FTP Pro is a PAID version. Screenshots are using the Free version.
Step Two: Configure Core FTP LE following these instructions. Click on any thumbnail for a larger image.
From the Top Menu: Sites > Site Manager > New Site button
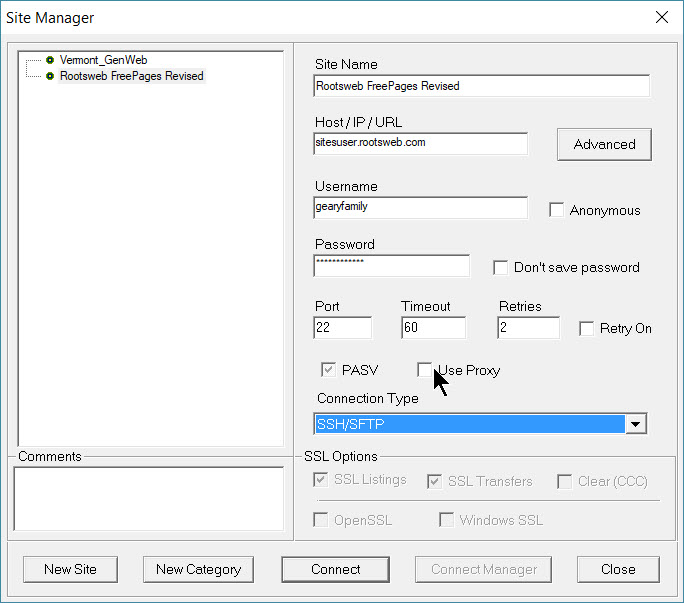
- Site Name: Your choice
- Host/IP/URL: sitesuser.rootsweb.com
- Username: your site name
Password: YOUR NEW PASSWORD - IMPORTANT NOTE: Passwords must be between 10 and 32 characters
long, and must contain at least one uppercase letter, one lowercase letter,
one number, and one of the following special characters:
_ ! @ # ( )
No other characters are allowed!! Asterisk (*) and ampersand (&) are NOT accepted characters. - Port 22 I left the other two with default settings
- Connection Type: SSH/SFTP
ADVANCED TAB:
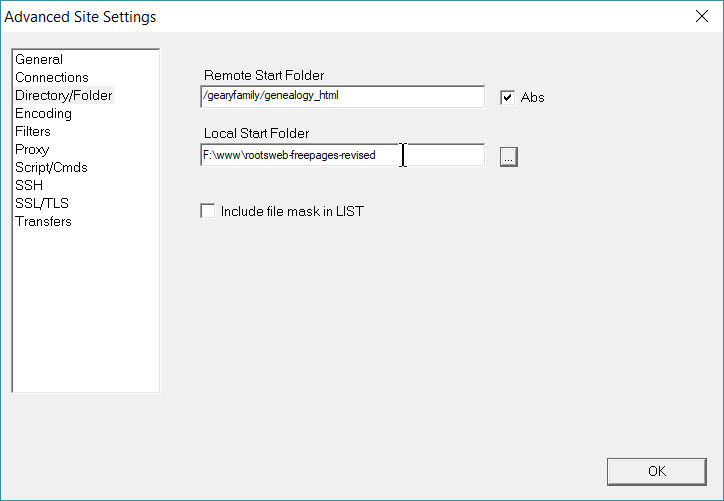
- Remote Start Folder: /sitename/genealogy_html NOTE: If you are connecting to your Homepages account, the remote folder will be public_html If you are connecting to a Freepages account, you will enter the appropriate community directory e.g. genealogy_html, family_html, misc_html, etc.
- Local Start Folder: Browse to the location on YOUR computer where you site is located.
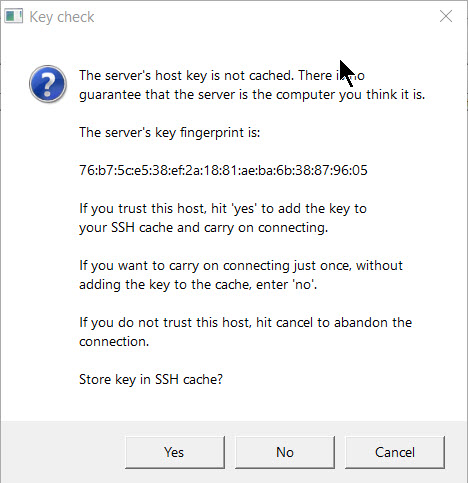
Click the Connect button
You will be presented with a Key Check Notice. Click Yes. NOTE: Once you click Yes, you should not see this message again.
Step Three: If you have followed the instructions, in the top section of the Remote directory you will see your site name, and in the Remote directory bottom section you will see directories/files that currently make up your site.

The first entry in the Remote directory section is a folder symbol with 2 dots after it; ignore it, as it is the link back to your root directory
Likewise, looking at your Local directory you will see a similar folder symbol, and the folder/files that are your local site.
You can now highlight any file/folder in your local site. right-click and select upload. IMPORTANT NOTE: Make sure you have the correct directory open on the remote site before you transfer your files/folder.
It may take some time if your connection is a dial-up, but if on an optical broadband connection it could be all done in a few minutes - or much less depending on the size of your site.
IMPORTANT NOTE: If you are using more than one community, you will need to do this for EACH community. NOTE: At the current time, you will not be able to view any of the other communities/directories on the Internet. RootsWeb is working on that.
DO NOT delete the unused folders (family_html, history_html, etc.). They are part of your account and structure and deleting them can corrupt your account.
Revised and Updated: September 4, 2018


